Thursday, December 16, 2010

Don't Touch the Metal

I do not like attaching metal eyelets to my latex garments but still have to add some kind of opening/closing mechanism where needed. I'm open for suggestions.

For this collar I used two textile straps with snap fasteners and soaked them with liquid black latex (top left).

I cut them apart and glued them behind the latex collar (top right) and reinforced them with a small strip of latex.

 
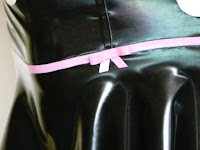
The picture at the bottom shows the construction from the front side. When closed only the small pieces of the straps on the right are visible and give the garment an interesting look.

Here is a finished example that uses the same mechanism.

Saturday, December 11, 2010

A Merry Latex Xmas

I'm currently working on a super secret set of cute and kinky latex underwear that will be shot with a really stunning model. More soon.

Meanwhile xmas is coming closer, so I started to make some xmas tree decorations like the christmas ball (bauble) shown on the photo.

I took a regular christmas ball and dunked it into liquid black latex. I had to carry and turn it while drying to avoid tears.

The stars are hand-cut from 0.4mm bubblegum latex and glued to the balled after it has dried. I attached to glue only to the stars backside. I hope you like it.

A merry latex xmas to all the people out there.

Sunday, December 5, 2010

Lace Garter Belt

This garter belt is a sequel to my experiments with self made latex lace. The back and side parts are made from 0.4mm purple latex. The front part is created from a piece of net lace that I put onto a glass surface and soaked it with transparent liquid latex. The glass side gets really smooth and shiny when oiled.

The trims are cut from 0.25mm black latex with a rotary cutter with a special blade that cuts a wave form.

I have uploaded the pattern to the pattern page.

Saturday, October 30, 2010

Bubblegum Combination and Pirate Skirt

I have been busy lately with some non-latex business, but I also finished a made-to-measure set of bubblegum lingerie: panties, bra and a pirate mini skirt.

The panties are basically another variant of the Polka Dot Zipper Panties, made of 0.35mm bubblegum latex with ruffles made of 0.25mm thick black latex rings.

[side note: the problem with Monique is that her mannequin body is not responsive to the soft and shaping tension of the latex garment, a real rubbergirl would benefit from. I hope, I can show you some live shots later.]

The bra is made of the same material with 10mm wide and 0.6mm thick latex shoulder straps. To allow the adjustment of the shoulder straps I added black plastic rings and sliders to the back.

The pattern files for both panties and bra can be found on my pattern page.

The pirate mini skirt is an additional garment that can be worn on top of the panties. On the photo you can still see a small band of the bubblegum latex and the panties' ruffles.

The skirt itself is made of a 40mm wide band of 0.25mm black latex with long ruffles made of the same material. The ruffles are created from two circles. The inner diameter of these circles is about 13cm (circumference of skirt divided by 2 times π) and the outer is about 40cm (inner diameter plus 2 times the desired length).

I also attached a small skull and bones applique cut from 0.35mm white latex (I found the same skull and bones theme on a lot of different web sites without any information on copyright. I hope I did not infringe the authors rights.).

I have also uploaded the mini skirt pattern to the pattern page.

Monday, October 18, 2010

Erotronics: Wiring Latex Garments

Consider the following idea: you want to attach a vibrating motor (e.g. from a cell phone) to a sensible area of a latex garment. You also want to attach a small battery and a magnetic switch (reed contact) to a different (less sensible) area. The installation needs some wires to work.

To solve the problem of glueing the wires without losing the ability to stretch (or break the wires), I took two strands of a very thin (0.1mm diameter) varnished copper wire and a piece of 5mm wide thin but strong card board. I wrapped the copper wire around the card board in narrow windings,  removed the card board carefully and stretched the wire spiral a little bit.

Then I glued the wire spiral (it's rather flat) between two 10mm wide layers of 0.15mm transparent latex (so you can see the wires). The cable strip is very elastic and can be glued along the seam of the garment.

Sunday, October 3, 2010

Polka Dot Zipper Panties

I created these panties from white latex and attached an invisible zipper, black polka dots, black ruffles and some bubblegum trims.

Pattern download


Instructions

  1. For the panties I cut out a front and two identical (mirrored) back parts from asheet of 0.35mm white latex. The back seam has a concave form to allow the curve along bottom and crotch.
  2. I soaked the tape of the 22cm long white invisible zipper with transparent liquid latex (latex does not stick to anything but itself). Latex milk will also do. To avoid a stained look when the zipper is applied to the latex, I soaked it from the front side first, and then (after drying) again from the back. The texture of the zipper tape will still be visible when glued (at least through thinner latex), so avoid any irregularities and do not soak the zipper's teeth. Latex Kitty has a tutorial on glueing zippers.
  3. Then I glued both back parts to the zipper tape and reinforced its back with two small latex strips (a little wider than the tape). I also closed the upper part of the back seam above the zipper with a strip of white latex.
  4. After the zipper was attached and reinforced, I glued both side seams, but not the crotch to front seam.
  5. For the polka dots I cut out about 20 black latex circles of about 3.5cm diameter, cleaned them (and the panties), applied the glue (only to the backside of the circles, not to the panties) and attached them. Finally I cut away overlapping circle parts.
  6. For the ruffles I cut out 8 rings of black latex with an inner diameter of 8cm and an outer diameter of 12cm. This gives 2cm wide rings for 2cm wide ruffles that can be glued (after cutting open) to the outer rim of the panties. Again Latex Kitty has a tutorial on making ruffles.
  7. I attached a 5mm wide bubblegum trim and two small bows along the ruffle seams
  8. Finally I glued the crotch to the front part (from behind). 

Saturday, October 2, 2010

Lace Experiments

I was really excited when I found a black polka dot net lace in my local drapery. It reminded me to some  impressive designs by Atsuko Kudo and to the task of integrating net lace into a custom creation.

While soaking the edge of some lace applique with liquid latex and glueing it to a latex garment is not a big challenge, I wanted to take a sheet of transparent latex and glue the lace behind it, so one can see the lace texture through the latex.

I cleaned the backside of two 0.25mm transparent latex pieces, put the net lace on top and soaked the lace with transparent liquid latex (top left).

On the top right is the result for a sheet of smokey latex. The dots and lace structure is barely visible.

The other example (bottom left) uses a piece of transparent pink latex that has a much better transparency.

For a final experiment (bottom right) I worked without a piece of latex and put the net lace directly on a glass surface and soaked it with liquid latex. When dry the backside has a smooth surface and the testing piece is thinner than in the previous examples.

While the results of these experiments are generally quite satisfying, two problems remain: the "laced" latex loses nearly all its ability to stretch and the "laced" side - where you still feel the lace texture - is not really comfortable on the skin. So this technique is best used sparely.

Do you know a better way to achieve similar results?

Thursday, September 30, 2010

Pattern Download

I'm currently considering to upload all my patterns and include the download links here in the blog. I usually create my patterns on paper or plastic film and transfer them to SVG with Inkscape. A small script generates A4 tiles from that. These tiles can be printed on an ordinary printer and glued together.

Here are the pattern files for Almrausch Intermezzo:

What do you think? Is this useful? Shall I publish more of my patterns? Can you print them without problems? Please comment.

Saturday, September 18, 2010

Almrausch Intermezzo

I was really impressed by Bathina's "Almrausch" underwear set, her first latex creation. She will wear it under her dirndl at the Oktoberfest. So, hurry, if you want so see her.

For my hipser style panties "Tribute to Bathina" I used 0.25mm black latex for the panties and 0.25mm transparent pink latex for the ruffles. 

A second one is made from 0.35mm bubblegum latex and 0.25mm black ruffles, but still unfinished.

I'm currently planning a third one (less hipster style) in white with a zipper in the crotch and some cute decals. 

Bathina, BTW, runs a German forum for sewing and free patterns and a blog, where she talks about a lot of sweet and cute things (like deers). Thank you for your inspiration.

Tuesday, September 14, 2010

Bubblegum Polka

This pencil skirt is another custom made to measure creation. I used a thinner (0.25mm) latex sheeting this time for the skirt and the ruffles.

The polka dots are hand-cut from 0.35mm white latex. I used the cone of an aerosol spray to draw about 40 circles and cut them out with my rotary cutter. To glue them onto the skirt I cleaned both the skirt and the circles, but applied the latex glue only to the backside of the circles.

I added a 5mm wide black trim to the bottom of the ruffles and a 5mm wide trim of bubblegum colored latex onto the seam of skirt and ruffles.

As an eye catcher I glued four little bubblegum bows to the trim. Latex Kitty has an excellent tutorial about making bows (and there is almost always some trim leftover).

For the waistband I used black elastic lace which I partly soaked with liquid black latex and glued it to the skirt with a 10mm wide bubblegum latex trim.

Bubblegum is a fantastic color, it reminds me of the bubble gum Hubba Bubba. I got the bubblegum latex from Heinz at Latexlabor in Frankfurt, in case you also want some.

Sunday, August 29, 2010

Lemongreen pencil skirt

This pencil skirt was created of 0.35mm lemongreen latex (from Blackstyle) with small 0.5mm wide contrasting edges of neon pink latex.  The skirt is made to measure for one of my customers.

For the creation I measured the circumferences of her body from the belly down to the knees (letting some room to allow walking) and divided each length by 4. Then I reduced the front seams by 5mm on each side at the hip and added that amount to the rear parts to give some extra space for the backside. These adjustments gave the skirt a perfect fit (you cannot see that on the photo, where the skirt is worn by Monique, not the customer).

For the flattering ruffles at the knees I cut out a ring of latex with an inner circumference approximately the same size as the the circumference of the lower end of the skirt (make it some centimeters larger if you need). The diameter of the outer edge is 10cm larger then that of the inner one. Remember: The circumference of a circle is the diameter multiplied with π (3.1415).

I cut the ruffle ring open and glued it to the skirt, adding the neon edges for contrast. Latex Kitty has a good tutorial for creating ruffles.

Tuesday, August 24, 2010

Introducing Frida and Monique

I already told you that I would like to show you my creations worn by a handsome model because the impression of worn latex underwear is a lot better than that of bras and panties lying on my working table.

Fortunately this weekend Frida and Monique joined our team. We immediately started an improvisational photo session to get the girls comfortable with the material. More photos will follow soon.


Sunday, August 15, 2010

Summer Update: the Missing Bra

While the Hello Kitty panties are really cute when worn, they still missed a corresponding bra.

After the summer holidays I have found some time to create it using the same techniques I used for the panties, but I did not add another decal. That would have been too much cuteness.

I would like to see and show you some photos of the bra and panties worn together. Anybody?

Wednesday, July 21, 2010

Good Vibrations

Let me introduce you to a little friend of mine: "Iconic Bullet" is a small, strong and beautiful toy from my very favorite brand Jimmyjane. Jimmyjane - by the way - also makes those wonderful "Afterglow" massage candles. Don't forget to get one (Pink Lotus if you follow my advice)!

When I first saw "Iconic Bullet" I immediately wanted to get one and make it part of one of my latex creations. So after a while of thinking, some sketching and working on a method to integrate the bullet into some panties, I finally came up with a very simple and clean concept, that even has an interesting visual side effect.

The panties that the bullet should be attached to were made from white latex (0.35mm) with 0.8mm wide red strips (0.35mm) attached at the edges. I used the same pattern as for my "Hello Kitty" model and glued two additional red strips in the form of a lying cross near the sides of the crotch (and under the edges). This leaves some unglued space below the center of the cross, where the bullet can be inserted.

As a side effect the red cross (without the bullet) has a connotation of either "X marks the spot" or some kind of "Do not enter" symbolism, whichever you might prefer more. When creating this model I was looking for a non-permanent solution, so the panties can be worn without the bullet and still have an interesting look.

The bullet is easily attached and looks like it was created just to be there. When worn, the red strips should have enough tension to hold the bullet in place even if vibrating.

But, this is currently untested.
Any volunteers? ;-)

Friday, June 25, 2010

Latex Emily

I think that latex underwear with a "Hello Kitty" decal is way too cute for some, so I chose a different and more counterculture character for this tutorial post: Emily the Strange from Cosmic Debris Etc, Inc.

You can see the image I selected to recreate in latex in the lower left corner of the first picture. Above is a (inverted for no particular reason) copy I printed onto a piece of adhesive label.

You also need some latex leftovers in black (0.25mm here), red (0.4mm) and white (0.4mm; not shown on the picture) and some cutting tools of your choice.

I started by glueing the adhesive label to the (cleaned with thinner) piece of black latex. Then I cut the contours of the Emily image with my cutter and the small scissors (use the tool you feel most confident with). As the character is quite complex and has very thin contour lines, this took a while and required patience and concentration during work. You can see the finished black part (without some face details) from the backside on the second picture.

I repeated the process with the red piece of latex, where I cut out the slingshot and the small ball. Because the red parts are later glued behind the black parts, there is no need to cut the the inner contours of the slingshot (see third picture).

On the third picture you can see, that I glued the black pieces (including face details) with the adhesive label side to a piece of paper with a mirrored print of the original motif. This fixes all parts in position and makes the addition of the red parts easier, especially when cleaning all surfaces with thinner.

As a last step I glued the black/red piece onto a small sheet of white latex.

Normally I would clean both parts with thinner and also apply latex milk onto both parts before I let them dry and put them together. For the creation of decals it is sufficient to apply the latex milk to only one part (here the black one) so you do not need to remove the glue from the other one (the red and white ones) later.

It is still necessary to cut the white latex into form. I followed the black contours and the right arm (I transferred it with another printed adhesive label) with the cutter and used some thinner to clean the decal from glue leftovers. The thinner has the additional benefit, that the edges of the black contours kind of "melt" to the red and white parts below. This gives the decal a cleaner texture.

On the last picture you can see the final work lying on a black background. I have talced the decal to preserve it until later (you might notice the matt look and the talcum powder in particular within the slingshot contours). I will show you a polished version later.

Caveat: you will notice that my contour lines are not as thin as the original ones. The reasons are, that on the one hand I might have been too anxious of cutting the contours too thin and spoiling my work. On the other hand the "melting" with thinner also added some width to the contours.

Monday, June 21, 2010

Cute and glossy

This one is cute.

I made these women's panties from white latex (0.35mm) with neon pink edges and black pleats. Making Latex Clothing has a pretty good tutorial on how to make pleats.

To the front side of the panties I attached a "Hello Kitty" decal I created from black and pink latex (Yes, the "Hello Kitty" is made of latex and glued to the panties).

BTW: Dear Sanrio, I used an image of your "Hello Kitty" character for this creation, without asking for your permission. I'm sorry if you are offended by this and will remove the picture immediately on request. I promise, I will never sell any items containing copyrighted material from you (or others). This is just a tribute to your character.

Do it yourself

I started doing latex clothes myself about half a year ago. The idea itself was a bit older and lurked within my brain another couple of months.

I learned quite a lot by reading and viewing some inspiring tutorial websites like RubberHans (an older page with some basic instructions, but still a good starter) and Making Latex Clothing (a great tutorial site by Latex Kitty) and finally began my work with one square meter of 0.40mm black latex, a bottle of latex glue (both from LatexFeeling) and a very simple pattern from RubberHans.

After a couple of "experiments" I created the set of woman latex underwear you see on the pictures in this post -- and yes, it was the first of my creations, that was good enough to be shown to a broader audience. So I also decided to start my blog of latex creations with this one.

This underwear is made of 0.35mm Neon Pink latex, which I ordered from Blackstyle, a latex online shop from Berlin. They sell quite a lot of colors and I suggest everyone to order their color set (54 colors).

I added a small (8mm) edge from black latex strips (0.4mm).

As an eye catcher I glued black elastic lace to the bra and the panties. I prepared the lace by painting the part that's normally sewn somewhere with liquid black latex.

The shoulder straps of the bra are cut from 1.2mm black latex strips (10mm wide).